If you’re planning to upgrade your PC, install drivers, or troubleshoot hardware issues, knowing your motherboard model is essential. Many people skip this step and end up downloading the wrong BIOS or buying incompatible parts. The motherboard is the core of your system, so getting its exact model matters more than you think.
The good part? You don’t need to open your PC immediately. There are several easy ways to find your motherboard model, whether your system is running or not.
Why Knowing Your Motherboard Model Matters
Before jumping into methods, here’s why this is important:
- Install correct BIOS and chipset drivers
- Check CPU, RAM, and GPU compatibility
- Upgrade storage (SSD, NVMe support)
- Troubleshoot hardware issues properly
Even boards that look similar can support completely different components.
Method 1: Use Command Prompt (Fastest Way)
This is the quickest method on Windows.
Steps:
- Press Windows + R
- Type cmd and press Enter
- Enter the command:
wmic baseboard get product,manufacturer,version,serialnumber - Press Enter
You’ll see details like:
- Manufacturer (e.g., ASUS, Gigabyte)
- Product (your motherboard model)
This method works on most systems without installing anything.
Method 2: Check System Information
A slightly more detailed method.
Steps:
- Press Windows + R
- Type msinfo32 and hit Enter
Look for:
- BaseBoard Manufacturer
- BaseBoard Product
This gives you the exact motherboard model name.
Method 3: Use DirectX Diagnostic Tool
Another built-in option.
Steps:
- Press Windows + R
- Type dxdiag
- Press Enter
- Check under the System tab
Sometimes it shows motherboard-related details depending on your system.
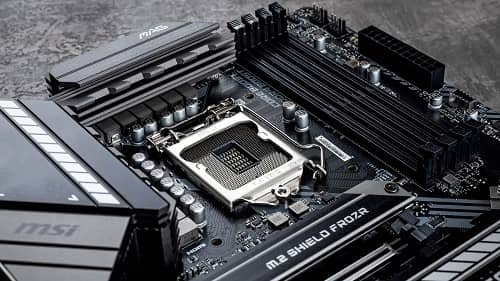
Method 4: Check Physically on the Motherboard
If your PC isn’t turning on or software methods fail, this is the most reliable way.
Steps:
- Turn off your PC and unplug it
- Open the CPU cabinet
- Look directly on the motherboard
What to look for:
- Large printed text (e.g., B450M DS3H, Z690-A)
- Usually near the CPU socket or RAM slots
- Brand name like ASUS, MSI, or Gigabyte
This gives you the exact model without any confusion.
Method 5: Use Third-Party Software
If you want detailed system info, these tools help.
Popular options:
- CPU-Z
- Speccy
- HWiNFO
These apps show:
- Motherboard model
- Chipset
- BIOS version
- Manufacturer details
Great if you’re planning upgrades or troubleshooting deeply.
Method 6: Check BIOS/UEFI
You can also find the model before Windows even loads.
Steps:
- Restart your PC
- Press Del, F2, or F10 during startup
- Enter BIOS/UEFI
- Look for system or board information
Most modern BIOS screens clearly display the motherboard model.
Method 7: Check the Original Box or Invoice
If you built your PC or still have the packaging, this is very easy.
Steps:
- Look at the motherboard box
- Find the model name printed on it
- Check invoice or purchase details
This is especially useful for warranty or resale.
Common Confusion: Model vs Chipset
Many users mix up these two:
- Model Number – B450M DS3H, Z790-A, etc.
- Chipset – B450, Z790, H610
The chipset is just a category. The full model name is what you need for drivers and compatibility.
Final Thoughts
Finding your motherboard model is simple once you know where to look. The easiest way is using Command Prompt or System Information. If your PC isn’t working, checking the physical board is the most reliable option.
It’s a small step, but it saves you from major mistakes like installing the wrong BIOS or buying incompatible hardware. Once you know your exact motherboard model, upgrading or fixing your PC becomes much easier.
If you want, you can share your system details here—I can help you identify your motherboard and even suggest compatible upgrades.